Enjoy all the episodes of G&G in one place. We’re trying out the Blip.tv player. Please let me know your feedback. Thx.
August 10, 2011
Enjoy all the episodes of G&G in one place. We’re trying out the Blip.tv player. Please let me know your feedback. Thx.
November 25, 2009
Just a quick update to my recent post detailing my experiences growing crops in my window. One month in and the plants are all looking healthy and have started producing food. I’ve been able to collect some royal burgundy beans, sugar snap peas, seranno peppers, cherry tomatoes, basil, sage and strawberries. Still waiting on the cucumbers, lettuce and bok choy to mature a bit.
A number of people have asked what I do about the bugs. I’ve found that they really aren’t a big problem. I’ve seen some gnat-like insects, mostly around the cucumbers. The bok choy has been attacked by a couple of pests as well. My solution was two-fold. I used a small amount of garden supply anti-catapillar treatment on the bok choy which seems to help a lot. The other thing I did was to introduce ladybugs into the garden areas. I’m sure some might find this concept a bit off-putting, but it doesn’t bother me at all to see the little red buggers, even when they are exploring the rest of the house. It just reminds me of all the bad insects they are eradicating.
Just for fun, I also got a pot full of Venus fly traps. Those insect-eating plants work, but a little too well. In addition to catching the gnats, they were most effective at trapping the ladybugs! Somehow THAT seemed cruel.
The original post is here.
Here are some recent pix…
November 18, 2009
Guns ‘n Gardens – How to Survive the Zombie Apocalypse is the number one web show for DIY tips and tricks for living through the tough times. Each episode we’ll explore the in’s and out’s of the wasteland, including the best weapons, first aid and food production techniques that will help you and yours see another day. Survive. Stay alive. With Guns ‘n Gardens.
November 6, 2009
Let me begin with a simple admission. I don’t know much about gardening. Until a few weeks ago, I had never planted a seed, or maintained houseplants. My thumbs weren’t green, they were red and swollen from playing Xbox. I had never given much thought to the source of the fresh food I consume or its impact, but recently I’ve started to experiment with growing my own.
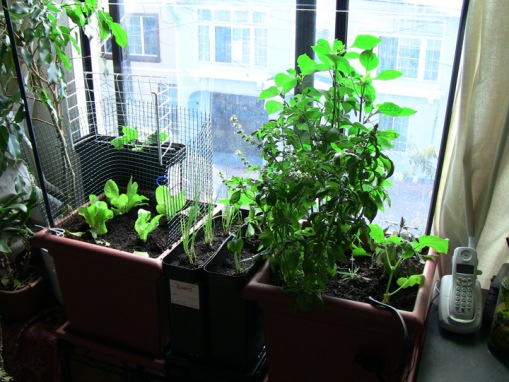
I live in the city and although I have a small yard, I have to occasionally share it with a family of local raccoons and other creatures. After several attempts at raising outdoor crops which accomplished little more than providing raccoon snacks, I decided to move my efforts indoors.
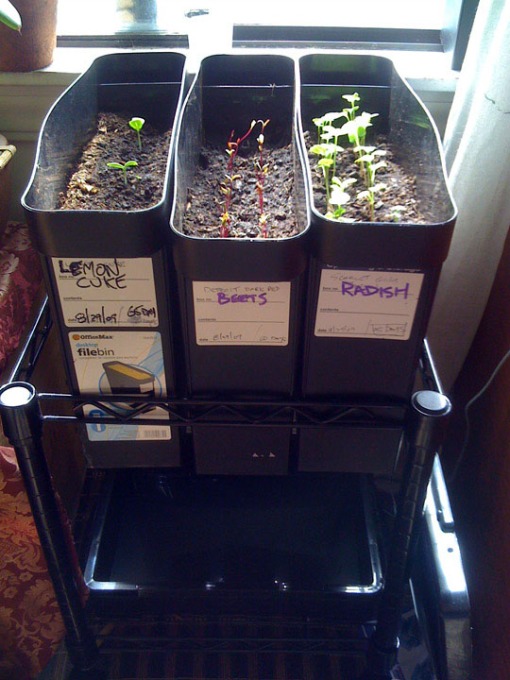
Two south-facing window spots offered enough sun and so I started experimenting. Within days the various plants were all responding well and so the experiments grew.
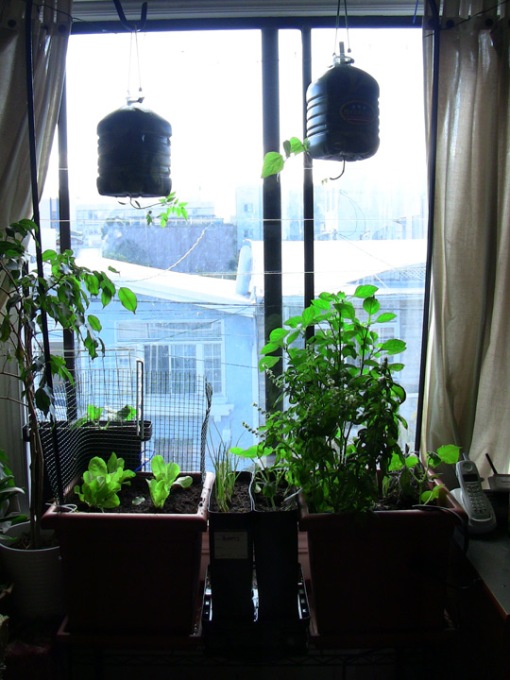

Traditional flower pots and planters were soon replaced by big black plastic storage bins from Office Depot which were less expensive and more efficient. I MacGuvered some one-gallon water bottles into hanging topsy turvy-style planters and tried a variety of vines, including tomatoes, pole beans, cucumbers and peppers.

Hanging crops above other plants is a great way to maximize the amount of growing space and conserve water, and it wasn’t long before the notion of “hanging water bottles” was upgraded and replaced by a complete garden row of inverted plants, all in black bins with holes drilled in them, effectively doubling the garden size. (12 ft by 1.5 ft)

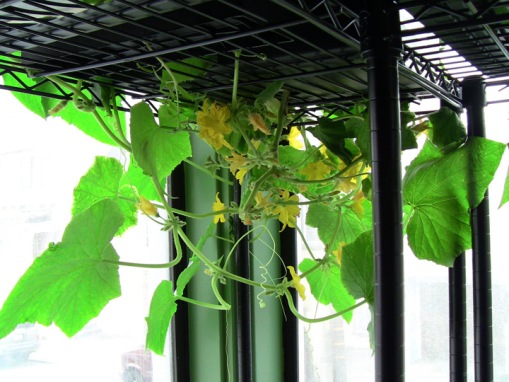
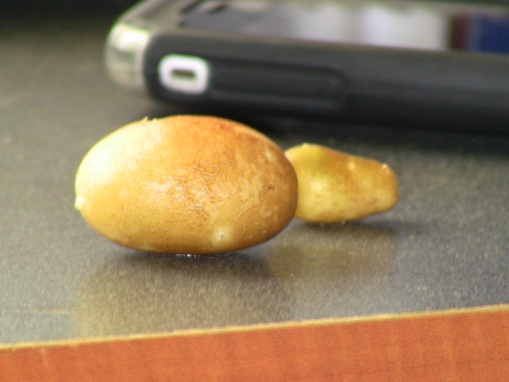
Initial harvests have been small as I figure out what crops work, but so far have I’ve enjoyed basil, tomatoes, romaine, yellow and burgundy beans and one tiny potato.


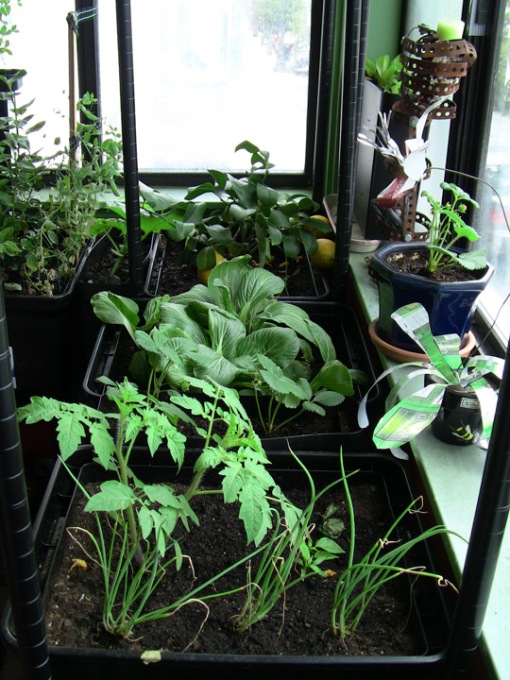
Current crops include more tomatoes, peppers, beans and cukes, plus butter lettuce, onions, sugar snap peas, bok choy, blueberries, strawberries, and a meyer lemon tree.

PART 2) More images and details here.
September 19, 2009
We at Gomi Style are pleased to announce the launch of our new sister site: SparkyJr.com.

Sparky Jr. is a one-stop shop for everything you need to make your own DIY videochat robot. We give you free software, instructions, templates and more – Plus a whole community of people making their own telepresence robots and rovers. Post your projects, ask questions, and see what others are making.

The Sparky project has been featured in Make Magazine, on PRI’s Studio 360 radio show, and been presented at AFI’s DigiFest, The San Jose Museum of Art, the SFMoMA and museums and galleries throughout the country.
Click Now and join the growing community of DIY Telepresence robot builders
August 20, 2009
Wow! I’m a double finalist! Two of my TV show pitches are in the top 10 finals of the Slamdance Unscripted Teleplay Competition. The winner will be announced next week. Wish me luck!
Here is a short teaser for PROMOSEXUAL, one of my finalists and one of the earliest appearances of Gomi Style.
Vodpod videos no longer available.
August 10, 2009
I didn’t intend to make a Bioshock / Fallout 3 character mash-up.
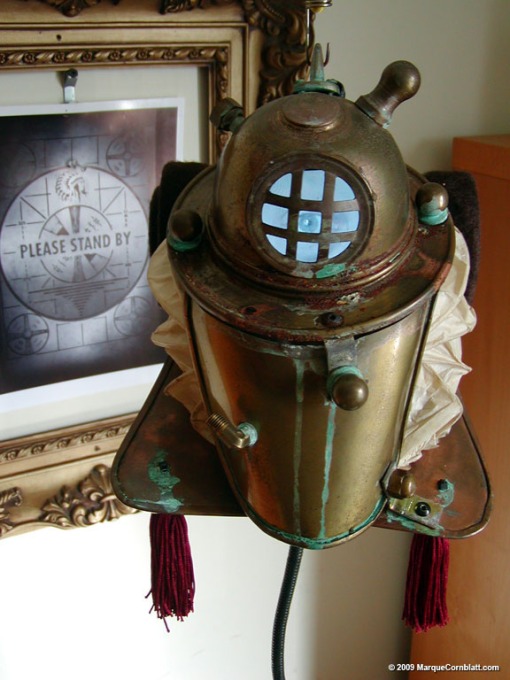
Self Portrait - Fly Daddy
The Self Portrait – Fly Daddy. Over the course of months, objects in my studio get assembled in interesting ways – like legos, but with junk. Bits and pieces are added, then taken away, then added again, until the assemblage of found objects and recycled scrap transforms into “something.” At first, it may be unclear what the new thing is –but as I continue to work, listening to the materials and their stories, they usually suggests a figurative character, some kind of weird living being with a personal narrative and rich history.
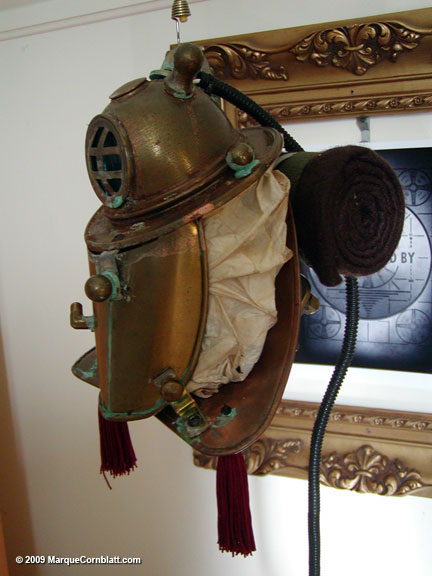
Fly Daddy Side View
This new piece seems to ask the question: What do you get when you cross a Big Daddy from Bioshock with a Bloatfly from Fallout 3?
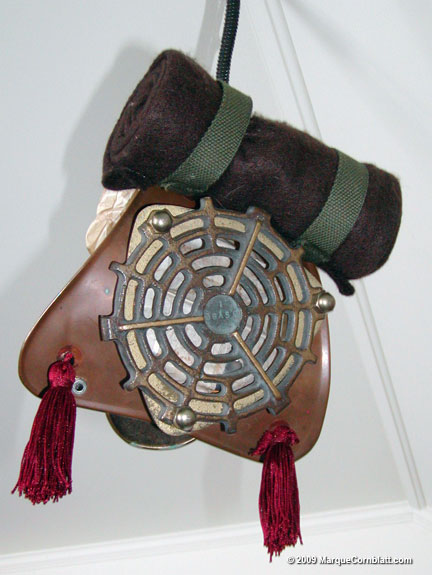
Fly Daddy Rear View
The answer is some kind of armored flying Cyclops apparently.
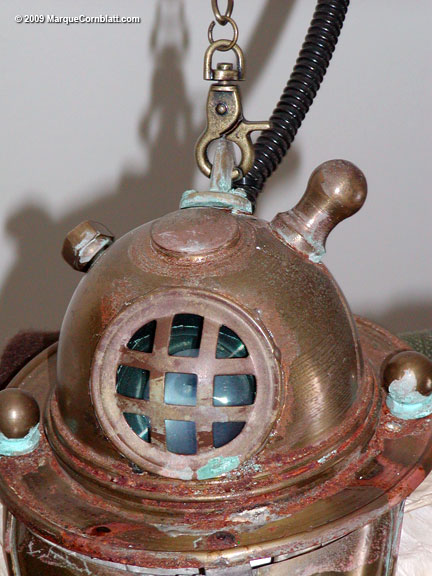
Fly Daddy Detail
Some of the materials used include a video loop played on an embedded mini DVD player and LCD monitor, a coffee bean dispenser, a paper lantern, a brass drain cover, several magnifying lenses, brass wallet chain, scrap textiles, brass and copper hardware.
May 14, 2009

Sparky and Marque
Make: Magazine has assembled a terrific profile of the Sparky project in anticipation of Maker Faire Bay Area 2009. Read it Here.
The folks at Make are a great bunch. They publish an essential how-to magazine and host the ultimate DIY science and art fairs all over the world. They have always been supportive of Sparky. Thanks Make!
May 3, 2009
Over the years, Sparky has gone through many changes and upgrades. The current version uses a Mac mini and Lilliput headrest LCD monitor. At first these components were powered by a small 12v. lead acid battery connected to a DC/AC inverter, but here’s a simple hack for running a them both directly from a lithium ion battery pack. Since the Mac and battery both run on DC power, this hack eliminates the DC/AC inverter and the Mac’s brick-sized wall wart. And the Li-Ion battery is a fraction of the size and the shaves more than 7 lbs. of the robot’s weight.
The new battery is a Digipower, 4.4Ah universal laptop battery from Radio Shack. It comes with a charger and a bunch of adapters for different laptops, cellphones and PDA’s. It offers a choice of 16 or 19 volts out, as well as a standard 5 V USB port. The Mac Mini requires between 14 and 18 V. and is easily powered from the primary power out, but the monitor is designed to run on 12 V A little probing on the battery’s internal circuit revealed an onboard 12 v. source, but getting that 12 V. power to the monitor would likely require a hole cut into the case and some sort of adapter hanging out, unless we opted to use the USB out to power the 12 V. monitor.
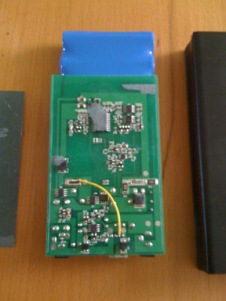
Jumper wired added to battery
This part of the job was much easier than we originally thought, requiring little more than splicing a single jumper wire on the battery circuit board. This choice comes with a BIG WARNING however. USB uses a 5 V power standard. Rewiring the USB for 12 V. means it will instantly DESTROY any and all USB devices plugged into it. It is ONLY to be used as a power source for this 12 V. monitor. It is highly recommended that you clearly label this USB port so that it doesn’t become a iPod killer or worse.
The only other part of the job is splicing Molex connectors to the Mini’s Power cord and RCA connectors to the monitor. We added connectors to both the original and the new wires so the robot can switch back and forth between the two batteries in just a minute.
Why Molex and RCA connectors? Two reasons. First, both connectors are designed to work reliably over and over, and second, I already had them lying around.
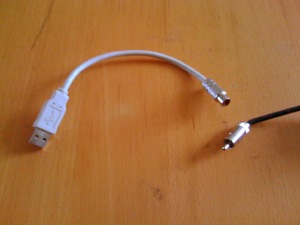
RCA spliced into USB for LCD power cord
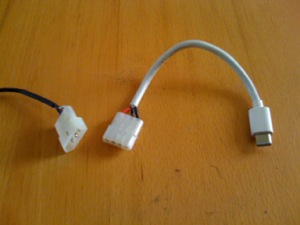
Molex spliced on Mac's power cord
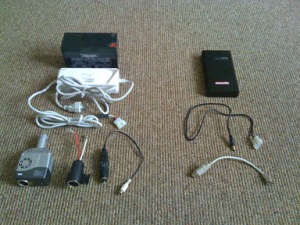
Lead acid vs. Li-Ion
In a somewhat scientific head-to-head test of both battery systems, we put them each on Sparky in full running mode. The original lead acid edged out the Li-ion with a running time of 1:35 to 1:10.
These results are pretty close to each other considering the lead acid is rated at 7Ah and the Li-ion is rated at 4.4Ah.
We also discovered that the Li-Ion runs a bit hot, so Frank suggested cutting a hole in the case, adding a 40mm fan and running it directly from the battery internally – the fan can be powered off the USB’s original 5 v. source, so it’s a fairly straight forward modification. I’ll update this post when I have pictures of that.
April 7, 2009
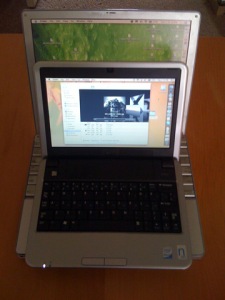
Little Hacky, sitting on little Macky
After reading some recent Giz posts regarding the Hackintosh Netbook made with a Dell 9 Mini I was intrigued. I needed exactly that. A small, affordable Netbook running OS X to be used as a “control booth” for Sparky, able to run our modified Skype video chat software as well as the joystick control plug-in.
When the Dell came up for sale recently for $199 I jumped at it. I upgraded the RAM and built-in webcam, but I mistakenly selected an 8 GB SSD hard drive. This project would have gone sooo much easier if I had the 16 GB upgrade. It came to about $275 with tax and shipping direct from Dell. I also purchased a fresh 10.5.6 OS X install for about $130 and an 8 GB USB Thumbdrive for about $30. I already owned a no-name external DVD drive (actually a CD-RW I later found out) so I thought I had everything I would need. And patience. Did I mention patience? Because that’s the one thing that was really needed once I realized how many work-arounds this project would require.
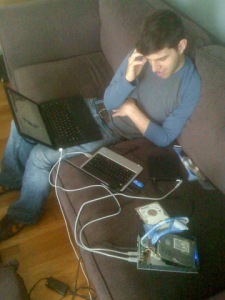
Connect Mini 9, OS X, Ext HD, Ext CD-RW, 8 GB USB Flash, Dell Mini Forums and Brain
There are many posts out there with more details than I could ever provide, so I’ll skip my usual step-by-step and leave it to the pros, but I will describe our solution in a broad stroke:
Ultimately we used another Macbook to install an OS X boot disc on an external hard drive and booted up the Dell with that. We already had an 8 GB thumbdrive prepared with a slimmed down version of the 10.5.6 installer disc and we used that to get OS X onto the Dell. To squeeze the bulk of 10.5.6 onto an 8GB SSD, we had to sacrifice the text-to-speech voices, as well as Apple’s mail app and all the other options available during the “custom install.” After numerous attempts we finally squeezed it down enough to fit.
As usual John C. Killed this project, ultimately delivering a perfect little Mac Netbook. But it took patience and creativity. It was an all-weekend, one-step-forward-two-steps-back kind of experience – mostly due to my poor choice of SSD size and thinking my external CD-RW was a DVD. Without those two mistakes, it is entirely possible to hack a dell 9 mini into a Mac in a few hours, I’m sure.
The final cost is about $450, less than half of the cost of the cheapest Apple laptop, and about a grand less than Apple’s netbook-ish Air. It may not have a big hard drive or internal DVD, but it’s not missing them either. It’s meant to be a Apple netbook. And that’s exactly what it is.
Some resources:
Original Gizmodo post
My Dell Mini Forums – All things Dell Mini
Monolingual – for slimming down OS X
Sparky Telepresence Project